If you want to build a nice outdoor pavilion for your backyard, we recommend you to read the tips and instructions described in the article with great attention. Invest in quality materials before starting the woodworking project, as to build a durable construction that will last for decades. Cedar, pine or redwood are excellent choices, as they combine their beautiful finish with a great durability.
On the other hand, there are a few designs you could choose from, so make sure you take a look over several alternatives before starting the woodworking project. Make adjustments to our plans if you want to create something unique that fits your budget. In addition, we recommend you to ask a skilled friend to assist you during the construction of the pavilion, as you have to lift several heavy components.
Outdoor Pavilion Plans
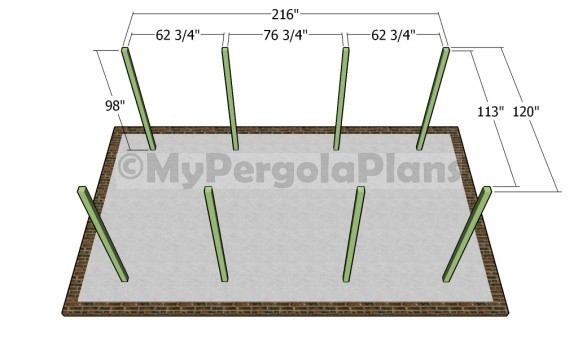
Fitting the posts
The first step of the project is to lay out the posts in a professional manner. Therefore, use batter boards and string to lay out the posts of the pavilion in a professional manner. Check if the corners are right-angled, by applying the 3-4-5 rule to each corner or by using a large carpentry square. Space the posts as described in the plans, in order to support the roof properly and to enhance the look of the pavilion.
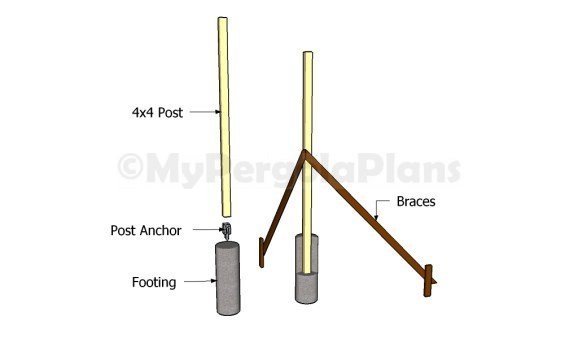
Installing the posts into place
Locking the posts into place is a straight-forward job, but you need to pay attention all the steps, in order to get a professional result. Therefore, dig 3′ deep holes (10-12″ in diameter), set tube forms and fit the posts into place, by using several wooden braces. Plumb the posts thoroughly before filling the holes with concrete. Alternatively, you could set the posts into place by using metal anchors.
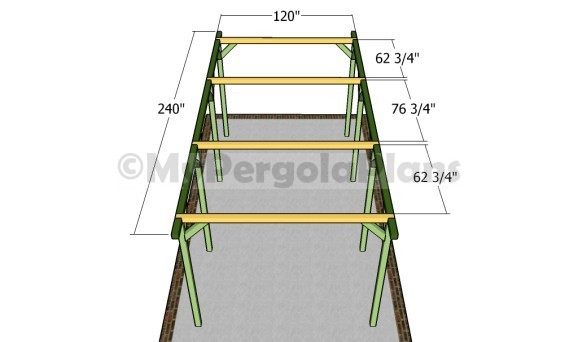
Fitting the top rails
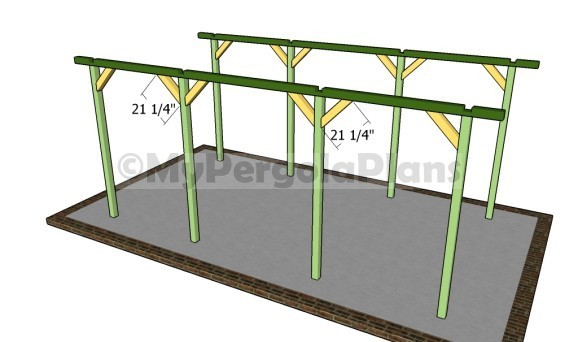
Continue the woodworking project by attaching the rails to the top of the posts, as shown in the image. It is essential to place a level on top of the rails to check if they are perfectly horizontal, before securing them to the posts with screws. Make sure the corners are right-angled between the rails and the perpendicular components, as well as between the rails and the posts.
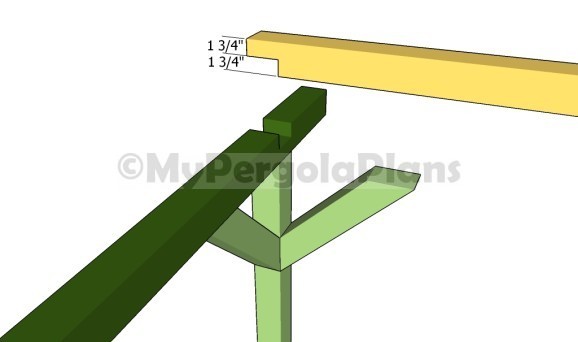
Joining the rails
It is essential to create proper joints between the rails and the top ridge supports, otherwise the structure won’t be rigid enough to distribute the weight of the components properly. In order to create the notches, we recommend you to make several parallel cuts and to remove the excess with a chisel. Set the components into place and drill pilot holes before inserting the 3 1/2″ galvanized screws. Add glue to the joints, if you want to make a durable structure.
Fitting the braces
If you live in a windy area you should reinforce the structure by fitting several braces to the construction. Therefore, cut both ends of the 4×4 components at 45 degrees before locking them into place. Align the braces at both ends, drill pilot holes and secure them into place with 3 1/2″ galvanized screws.
Attaching the top ridge
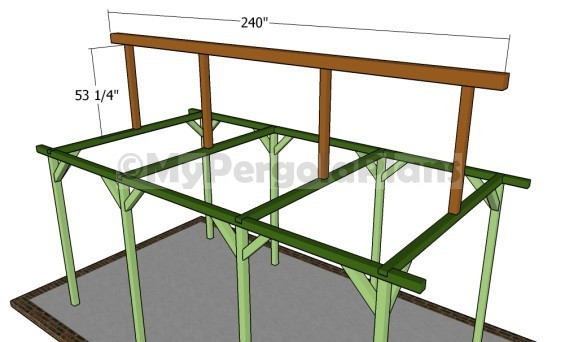
Next, you have to fit the top ridge to the supports, as described in the plans. Cut the 4×4 supports to the right size and lock them to the horizontal components with several screws. You could either drill pocket holes through the supports and insert the screws into the horizontal components, or drill pilot holes through the supports and insert the screws into the supports. Fitting the 6×6 top ridge is a complex process, as you will need help when lifting it from the ground and setting it into place. Insert several screws to create tight joints between the supports and the top ridge.
Building the rafters
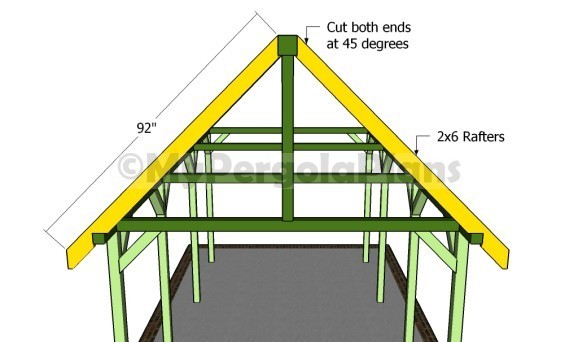
Building the rafters for the outdoor pavilion is a straight-forward process, but you still need to pay attention to several steps. Therefore, we recommend you to cut both ends of the rafters at 45 degrees, by using a proper miter saw. In this manner, all the rafters will be cut at the same angle and they will fit into place properly. In addition, you need to cut out a notch at the bottom of each rafter, in order to fit into place easily.
Fitting the rafters
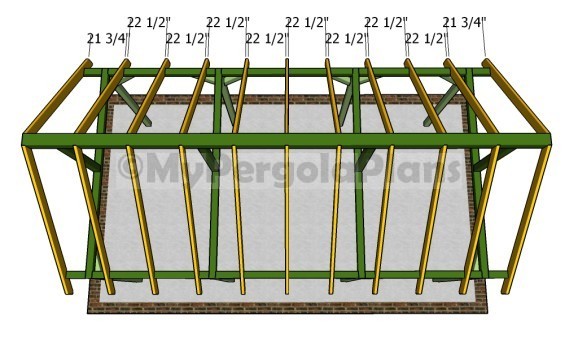
Align the rafters at both ends and make sure they are equally-spaced, in order to support the weight of the roofing properly and to create a nice symmetrical appearance. Drill pilot holes and secure the rafters to the top ridge and to the top rails with galvanized screws.
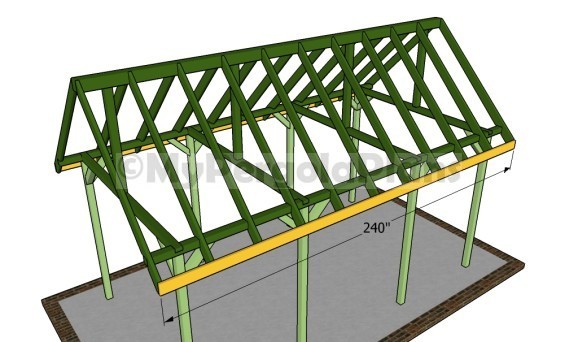
Fitting the trims
Attach 1×4 trims to the ends of the rafters, in order to enhance the look of the outdoor pavilion. Align the trims at both ends and secure them into place with finishing nails. Add waterproof glue to the joints, if you want to create a durable bond between the components.
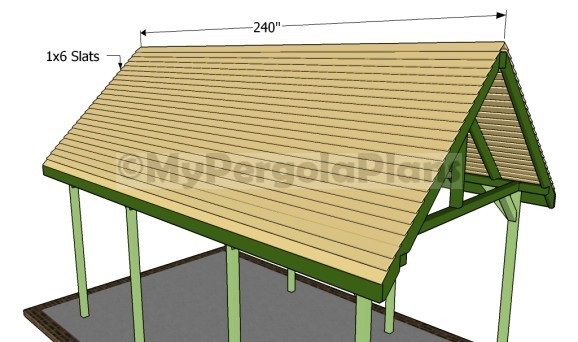
Attaching the roofing slats
There are several alternatives when building the roof of the pavilion, such as shingles, corrugated sheets or wooden boards. If you want to get a rustic appearance, we recommend you to attach 1×6 wooden boards to the rafters, starting with the bottom section of the roof. Align the boards at both ends and secure them into place with galvanized screws. Make sure the boards overlap several inches, as to hide the screws and to create a nice effect.
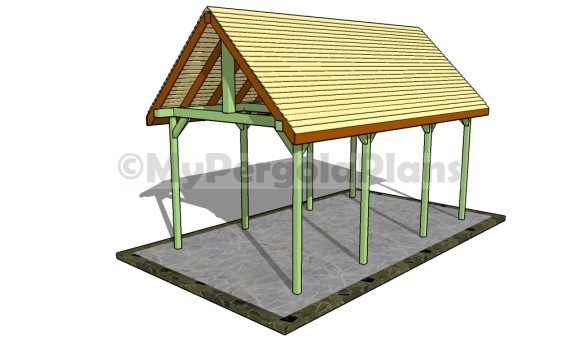
Outdoor Pavilion Plans
Last but not least, we recommend you to pay attention to the finishing touches. Therefore, check if all the screws are inserted properly and fill the holes with wood putty. Smooth the surfaces with 120-grit sandpaper along the wood grain. In addition, apply several coats of paint over the components in order to protect them from decay and to enhance the look of the wooden pavilion.
Tools & Materials
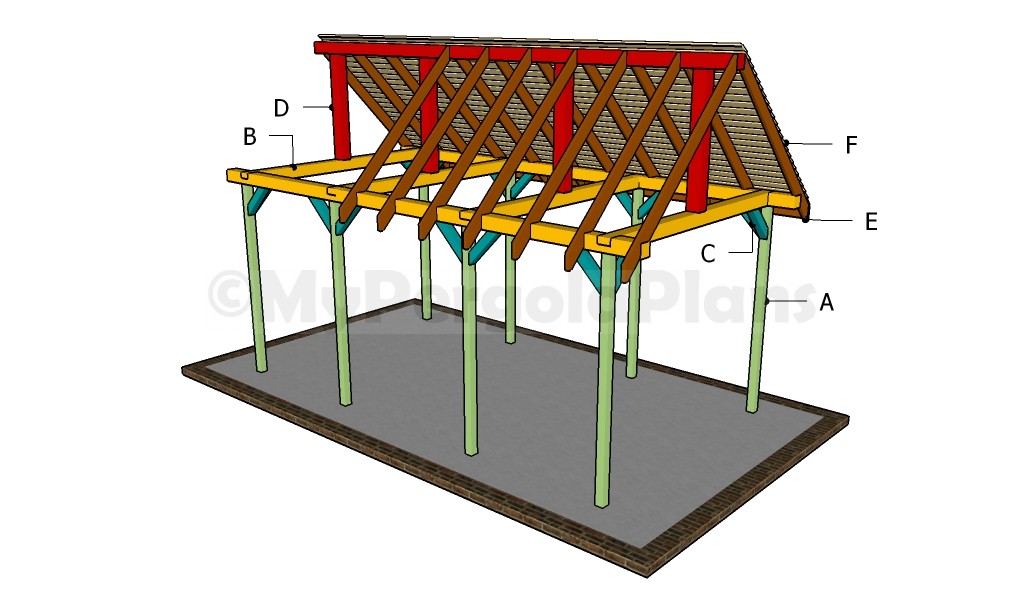
Building an outdoor pavilion
- A – 8 pieces of 4×4 lumber – 98″ POSTS
- B – 2 pieces of 4×4 lumber – 240″, 4 piceces – 120″ RAILS
- C – 12 pieces of 4×4 lumber – 21 1/4″ BRACES
- D – 4 pieces of 4×4 lumber – 53 1/4″, 1 piece – 240″ TOP RIDGE
- E – 2 pieces of 1×4 lumber – 240″ TRIMS
- F – 48 pieces of 1×6 lumber – 240″ ROOFING
- Safety gloves and glasses
- Circular saw, Jigsaw
- Tape measu, Spirit level, Carpentry pencil
- Drill machinery and Drill bits
Backyard Pavilion – Video!


