If you want to build a nice arbor bench for your backyard, we recommend you to read the tips and instructions described in the article with great attention. Invest in quality materials before starting the woodworking project, as to build a durable arbor with a pleasant appearance. Cedar, pine or redwood are excellent choices, as they combine their beautiful finish with a great durability.
Choose the most appropriate design for your needs and don’t be afraid to adjust the dimensions of the components until they match the size of your backyard. If you don’t have a large expertise in the field, we recommend you to gather all the tools and materials before assembling the arbor together. Use professional tools and techniques to get the job done in a professional manner, from the very beginning.
Diy Pergola Plans
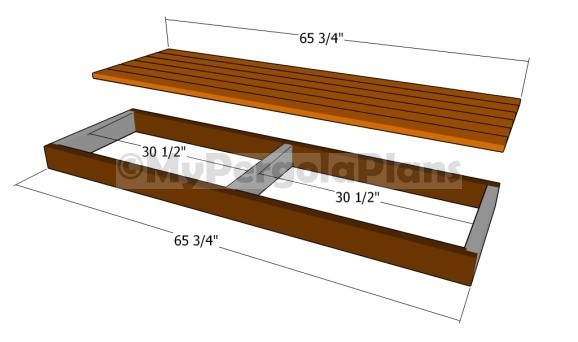
Building the seat
The first step of the project is to build the seat of the arbor bench. As you can see in the image, we recommend you to build the components from 2×4 lumber and to assemble them as in the image. Cut the components at the right dimension and lock them together with galvanized screws. Make sure the corners are right-angled before assembling the frame. Attach the 1×4 slats over the frame and lock them into place with galvanized screws.
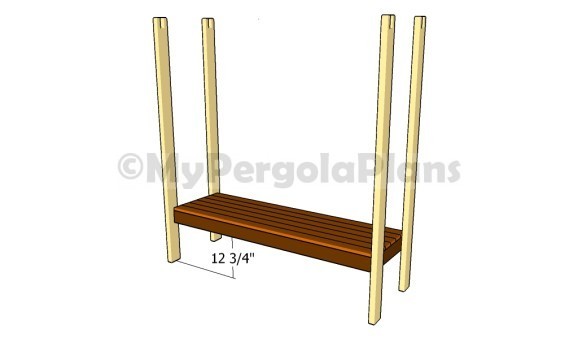
Attaching the bench seat
Continue the project by attaching the legs to the bench, as in the image. Plumb the legs with a spirit level and make sure the bench is horizontal before drilling pilot holes and inserting the screws. Ask a friend to give you a hand when attaching the legs to the seat, otherwise the process would be a lot more difficult.
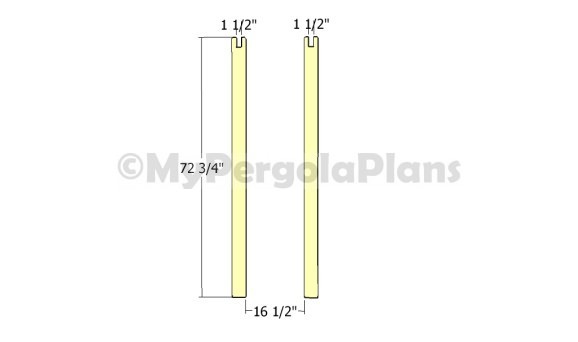
It is essential to cut the top of the legs as in the plans, otherwise you won’t be able to fit the rafters into place. Drill pilot holes through the top of the legs before inserting the carriage bolts into the rafters.
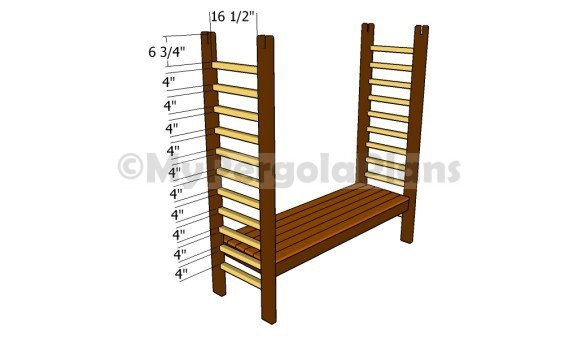
Attaching the supports to the sides of the arbor
Fit the supports between the legs and lock them into place with pocket screws. Pre-drill pocket holes at both ends of the supports before locking them to the legs with 2 1/2″ galvanized screws.
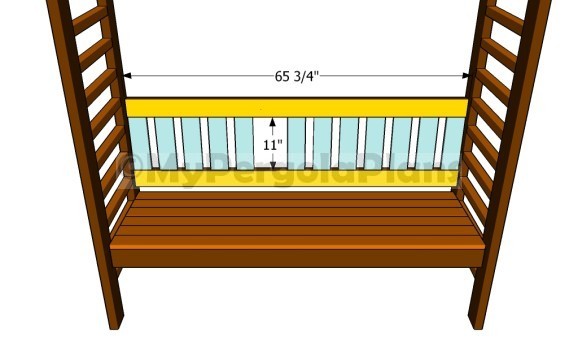
Attaching the back rest
Build the frame of the back rest out of 2×4 lumber and the slats out of 1×4 lumber. Work with attention and Drill pocket holes using a jig, before inserting the screws. Add waterproof glue to the joints, in order to create a rigid structure.
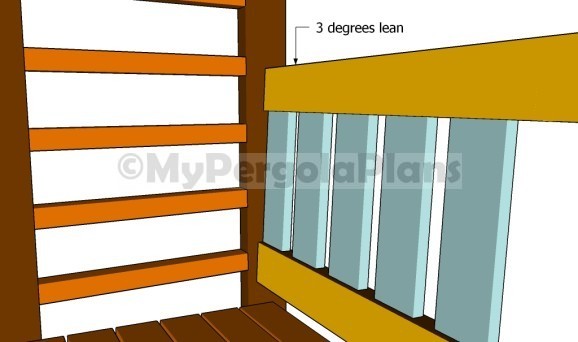
Back rest
It is essential to lean the back rest several degrees, otherwise it will not be as comfortable as you might imagine.
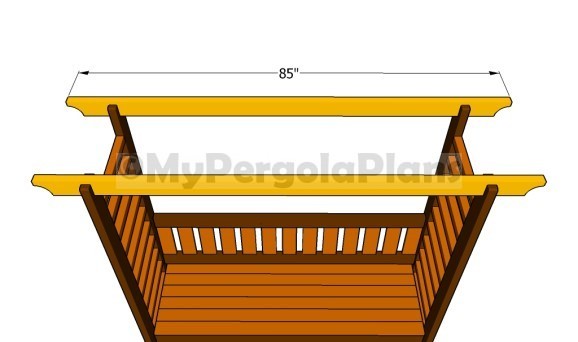
Attaching the rafters
The next step of the project is to attach the rafters to the top of the posts, as it can be shown in the plans. Cut the ends of the 2×4 lumber in a decorative manner, before attaching them into place and inserting the carriage bolts. Place a spirit level on top of the rafters to check if they are perfectly horizontal.
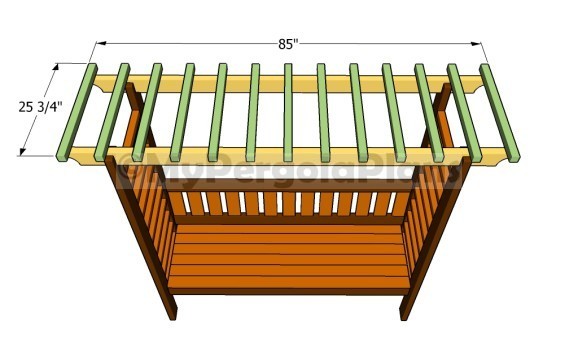
Attaching the top to the arbor
One of the steps of the project is to attach the pieces of 2×2 lumber to the supports. Drill pilot holes at both ends of the components before locking them to the supports with 2 1/2″ galvanized screws. Make sure you place the supports equally spaced, if you want to get even gaps between the them and a symmetrical look.
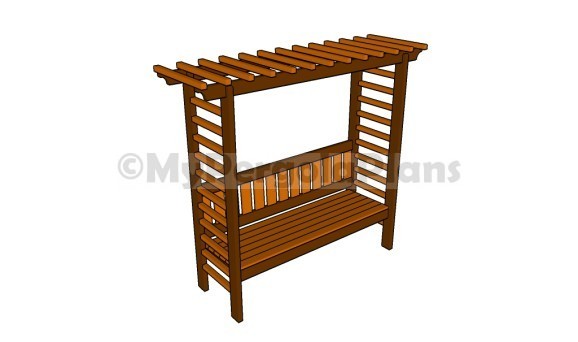
Arbor bench plans
Last but not least, we recommend you to pay attention to the finishing touches. Therefore, check if all the screws are inserted properly and fill the holes with wood putty. Smooth the surfaces with 120-grit sandpaper along the wood grain. In addition, apply several coats of paint over the components in order to protect them from decay and to enhance the look of the bench with back support.
Tools & Materials
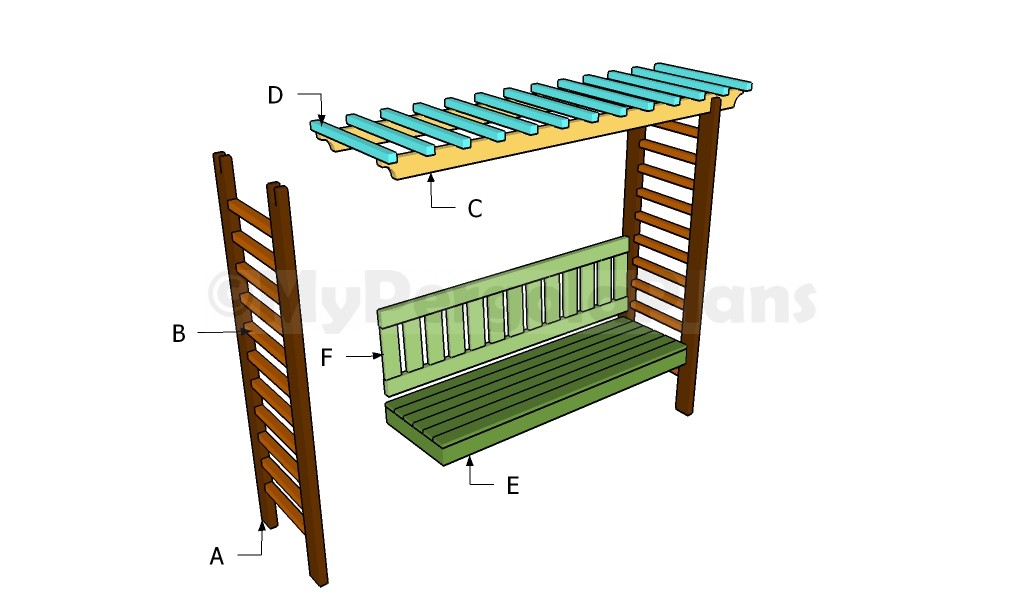
Building an arbor bench
- A – 4 pieces of 2×4 lumber – 72 3/4″ LEGS
- B – 22 pieces of 2×2 lumber – 16 1/2″ SUPPORTS
- C – 2 pieces of 2×4 lumber – 85″ RAFTERS
- D – 13 pieces of 2×2 lumber – 25 3/4″ SUPPORTS
- E – 2 pieces of 2×4 lumber – 65 3/4″, 3 pieces – 18″, 6 pieces of 1×4 lumber – 65 3/4″ SEAT
- F – 2 pieces of 2×4 lumber – 65 3/4″, 13 pieces of 1×4 lumber – 11″ BACK REST
- Safety gloves and glasses
- Circular saw, Jigsaw
- Tape measu, Spirit level, Carpentry pencil
- Drill machinery and Drill bits

