If you want to build a nice attached pergola for your backyard, we recommend you to read the tips and instructions described in the article with great attention. Invest in quality materials before starting the woodworking project, as to build a durable arbor with a pleasant appearance. Cedar, pine or redwood are excellent choices, as they combine their beautiful finish with a great durability.
When building an attached pergola, there are certain things that you should know from the very beginning. First of all, in most of the cases you need a building permit, so make sure you get accustomed with the building codes before starting the actual construction. In addition, we recommend you to adjust the size and the design of the pergola to suit your needs and budget.
Attached Pergola Plans
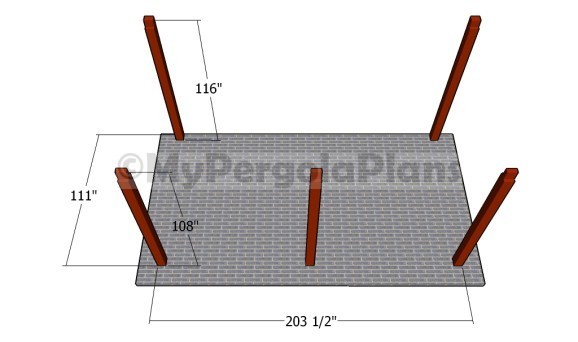
Laying out the pergola
First of all, we recommend you to lay out the posts of the attached pergola in a professional manner. Therefore, we recommend you to use batter boards and string. Check if the corners are right-angled by using a large carpentry square or by applying the 3-4-5 rule.
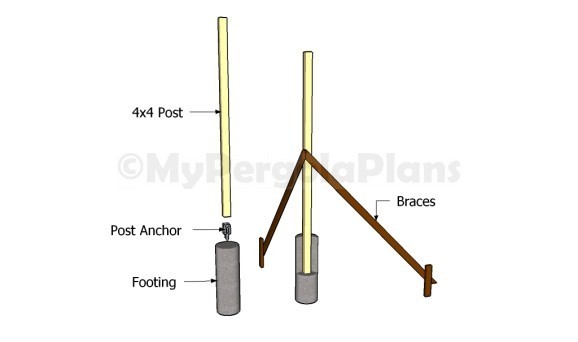
Installing the posts into place
Securing the 6×6 posts into place is one of the most essential steps of the construction process. Therefore, we recommend you to dig 3′ deep holes (10-12″ in diameter), fit tube forms and set the wooden posts into place. Plumb the posts with a spirit level and secure them temporarily with braces. Fill the tube forms with concrete and let it dry out for several days before continuing the project. Alternatively, you could set the metal anchors into concrete and set the posts into place with screws.
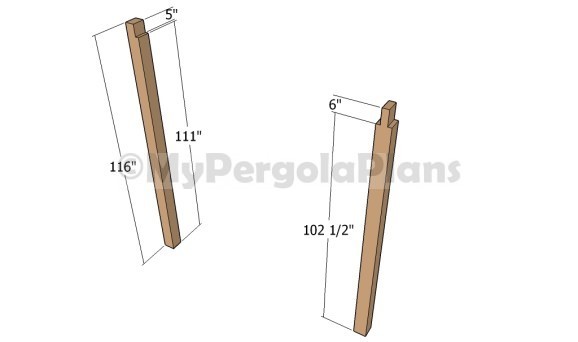
Building the posts
As you can notice in the image, you need to cut several notches at the top of the front and back posts. Make sure you take accurate measurements and the 1 1/2″ deep notches are done properly. Make several parallel cuts with a circular saw and clean the recess with a chisel. Smooth the surface with a piece of fine-grit sandpaper.
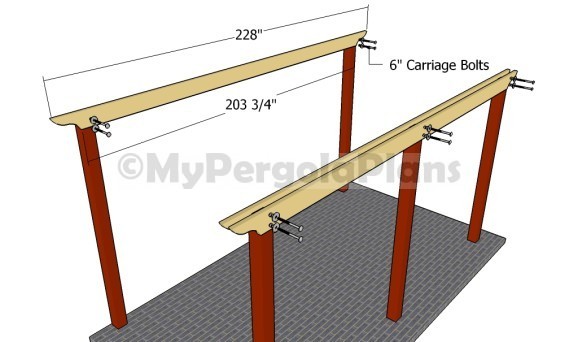
Fitting the support beams
Attaching the support beams to the top of the posts is the next step of the woodworking project. Cut the ends of the 2×8 beams in a decorative manner and lock them to the top of the posts with carriage bolts. Align the beams with great care, drill pilot holes and insert 6 1/2″ carriage bolts. Place a spirit level on top of the beams to check if they are perfectly horizontal.
Attaching the trims to the posts
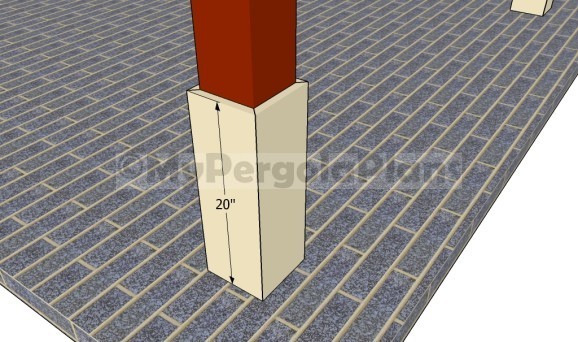
If you want to enhance the look of the posts, you could add nice trims. Build the trims out of 1×8 lumber, by using the following method. First of all, you need to adjust the width of the trims to 7″. Afterwards, cut both sides of the trims at 45 degrees, by using a good miter saw. Attach the trims to the bottom of the posts and lock them into place with waterproof glue and finishing nails.
Fitting the rafters
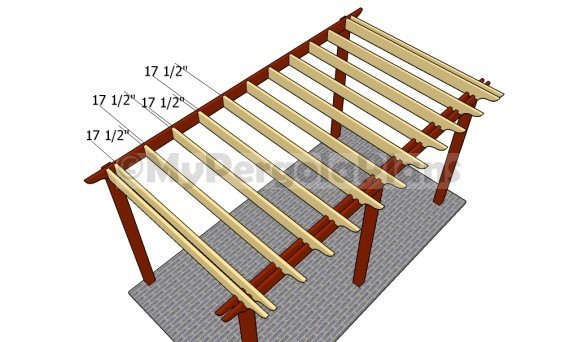
Continue the pergola project by attaching the rafters to the support beams, as shown in the plans. In order to get the job done in a professional manner, we recommend you to place the rafters equally spaced. Drill pilot holes at one end of the rafters and insert the galvanized screws into the support beam placed on the wall. In addition, drill pilot holes through the top of the rafters, at the opposite end, and insert galvanized screws into the support beams.
Rafters plans
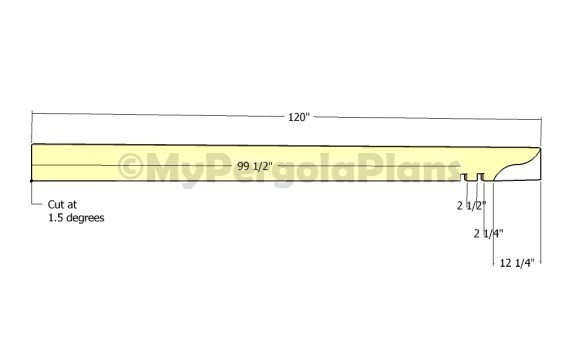
In order to build the rafters in a professional manner, we recommend you to use the information described in the image. Use a circular saw to make the straight cuts and the notches, while the curved cuts should be done with a jigsaw.
Fitting the spacers
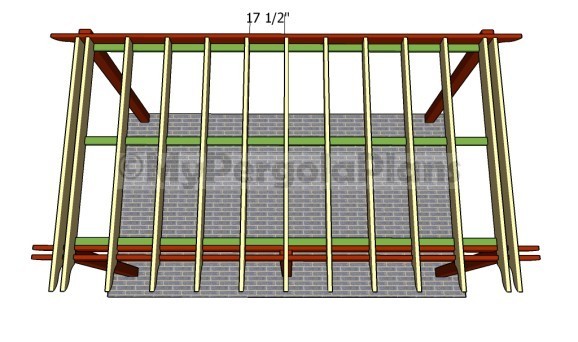
In order to reinforce the structure of the roof, we recommend you to fit 1×2 supports between the rafters. Work with attention and Drill pocket holes at both ends of the blockings, before inserting the 1 1/4″ galvanized screws into the rafters.

Attached pergola plans
Last but not least, we recommend you to pay attention to the finishing touches. Therefore, check if all the screws are inserted properly and fill the holes with wood putty. Smooth the surfaces with 120-grit sandpaper along the wood grain. In addition, apply several coats of paint over the components in order to protect them from decay and to enhance the look of the attached pergola.
Tools & Materials
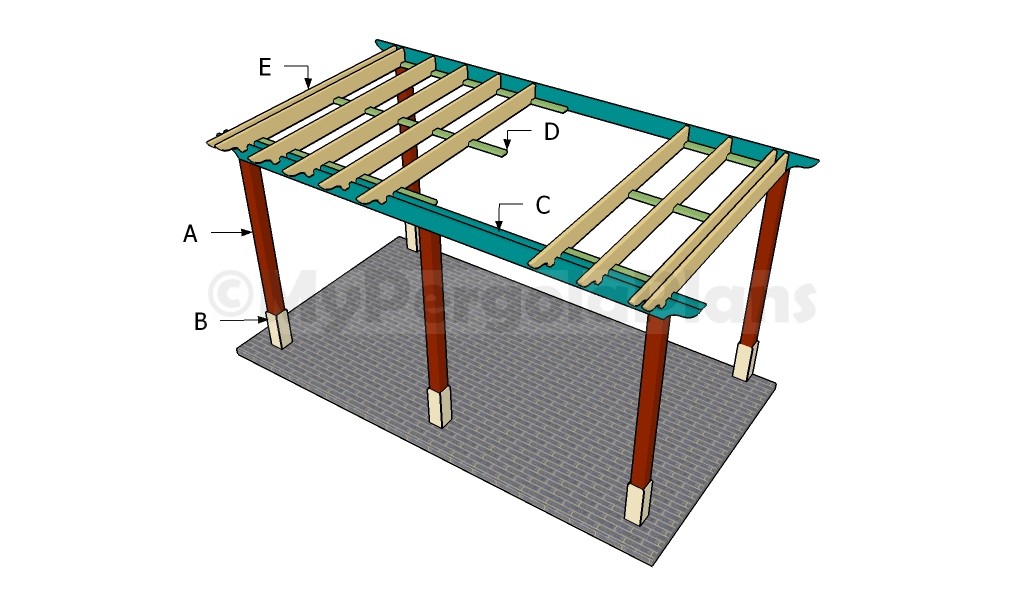
Building an attached pergola
- A – 2 pieces of 6×6 lumber – 116″, 3 pieces – 108 1/2″ POSTS
- B – 20 pieces of 1×8 lumber – 20″ TRIMS
- C – 2 pieces of 2×8 lumber – 228″ SUPPORT BEAMS
- D – 30 pieces of 1×2 lumber – 17 1/2″ BLOCKINGS
- E – 13 pieces of 2×8 lumber – 120″ RAFTERS
- Safety gloves and glasses
- Circular saw, Jigsaw
- Tape measu, Spirit level, Carpentry pencil
- Drill machinery and Drill bits


