If you want to build an interesting bench for your patio with a modern design, we recommend you to pay attention to the instructions described in this article. Make sure you adjust the dimensions and the look of the wooden bench to suit your needs and to match with the style of your backyard. What is unique about this bench is that it has enough storage space to deposit several items.
If you don’t have an extensive expertise in woodworking field, we recommend you to plan every step with attention and to gather all the materials and tools from the very beginning. Select the lumber with great care, as the components should be weather-resistant and have a nice natural finish. Therefore, choose from cedar, pine or redwood, making sure the components are perfectly straight and in a good visible condition.
Modern Bench Plans
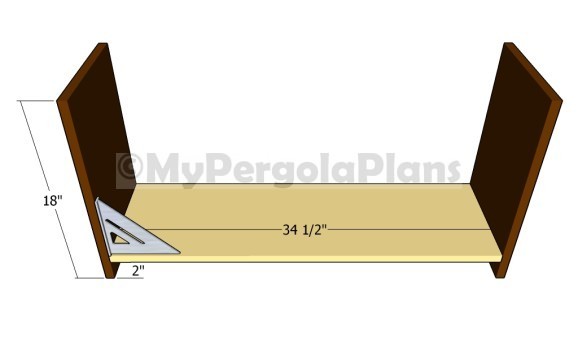
Building the frame of the bench
The modern bench has a really nice design and simple, so we recommend you to follow the instructions and assemble the frame in a professional manner. Use 1×12 lumber and check if the corners are square before inserting the screws. Drill pocket holes at both ends of the bottom shelf before inserting the 1 1/4″ galvanized screws. Add waterproof glue to the joints and remove the excess with a damp cloth. Place a spirit level on top of the horizontal component to make sure it is aligned properly.
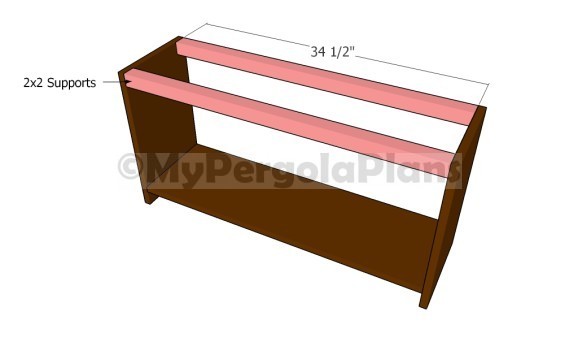
Attaching the seat supports
The next thing you should do is to attach the 2×2 supports to the top of the bench. Fit the supports between the two sides of the bench and lock them into place with screws. Drill pocket holes at both ends of the supports and attach them to the sides with pocket holes and waterproof glue.
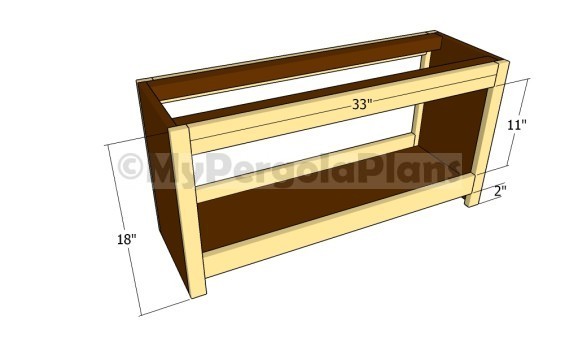
Attaching the trims
If you want to get a professional look for your bench, we recommend you to build the side trims from 1×2 lumber and the horizontal trims out of 1×3 lumber. Align the trims at both ends and lock them into place with finishing nails and waterproof glue.
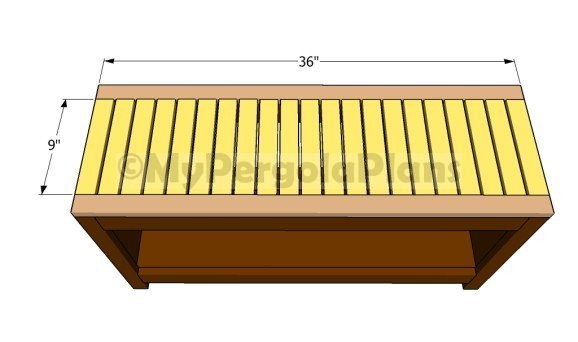
Attaching the seat
Attaching the seat slats to the top of the bench is a straight forward process, but you need to take your time when spacing the slats, as to create even gaps. Drill pocket holes at both ends of the small slats and insert 1 1/4″ screws into the perimeter components. Attach the seat over the frame and lock it into place from underneath. Drill pilot holes through the supports and insert the screws into the seat.
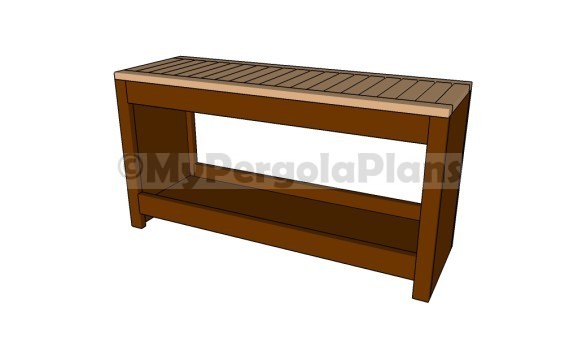
Modern bench plans
Last but not least, we recommend you to pay attention to the finishing touches. Therefore, check if all the screws are inserted properly and fill the holes with wood putty. Smooth the surfaces with 120-grit sandpaper along the wood grain. In addition, apply several coats of paint over the components in order to protect them from decay and to enhance the look of the bench with a modern design.
Tools & Materials
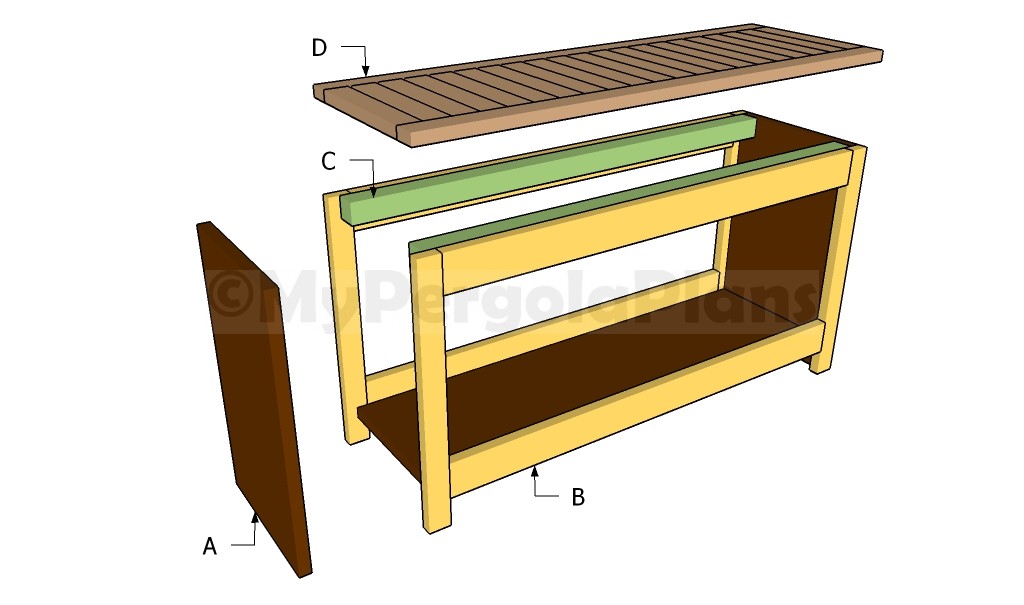
Building a modern bench
- A – 2 pieces of 1×12 lumber – 18″, 1 piece – 35 1/2″ FRAME
- B – 4 pieces of 1×2 lumber – 18″, 4 pieces of 1×3 lumber – 33″ TRIMS
- C – 2 pieces of 2×2 lumber – 34 1/2″ SUPPORTS
- D – 2 pieces of 1×2 lumber – 36″, 21 pieces – 9″ SEAT
- Safety gloves and glasses
- Circular saw, Jigsaw
- Tape measu, Spirit level, Carpentry pencil
- Drill machinery and Drill bits
