If you want to build a nice and simple garden bench, we recommend you to read this article with attention. Although this bench doesn’t have a classical look, it still has a beautiful appearance and can match the style of any garden or backyard. If you find it necessary, you could also adjust the design and the size of this wooden bench as to suit your needs and to add value to your home.
If you are going to place the seat in your garden, make sure you lay it on a concrete surface, as to protect the legs from moisture. In addition, it is important to invest in weather-resistant lumber, such as cedar, pine or redwood. After filling the holes with putty and sanding the whole surface, we recommend you to apply a few coats of paint or stain to the components to protect them from rain.
Garden Bench Plans Free
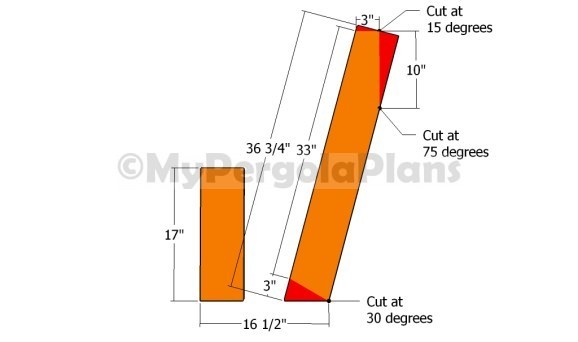
Building the legs
The first step of the bench project is to build the legs of the bench, as it can be seen in the diagram. Mark the cut lines with pencil and get the job done with a circular saw. Smooth the cut edges with fine-grit sandpaper before continuing the assembly of the garden bench.
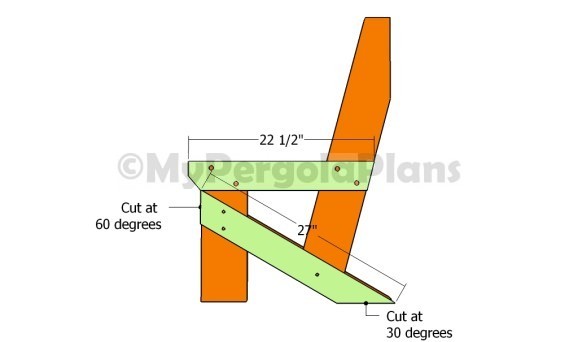
Attaching the braces
Building the wooden braces for the garden bench is a straight-forward project, but you need to pay attention to several aspects. Therefore, we recommend you to build the exterior braces using 2×4 lumber, while de interior ones should be made out of 1×4 slats. Mark the cut lines with a pencil and get the job done with circular or miter saw.
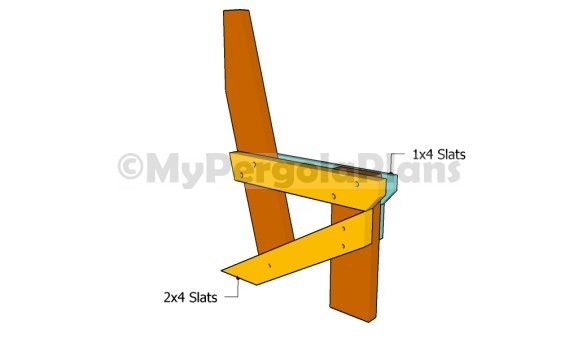
Building the sides of the bench
After the interior slats, we recommend you to align all the components with attention and to drill several pocket holes before inserting the carriage bolts. If you want to enhance the rigidity of the frame you could also add waterproof glue to the joints.
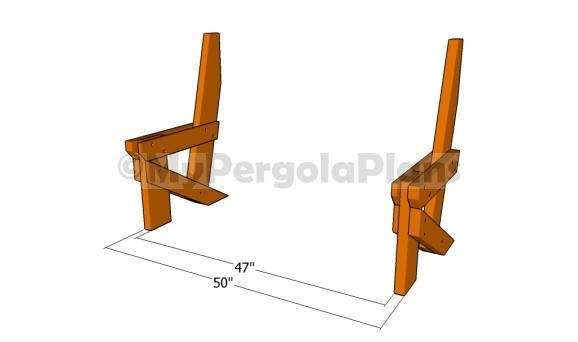
Building the frame of the bench
You can adjust the size of the bench to suit your needs, so you don’t have to space the sides as described in the diagram. Nevertheless, you really need to make sure the side components are exactly the same in size and shape.
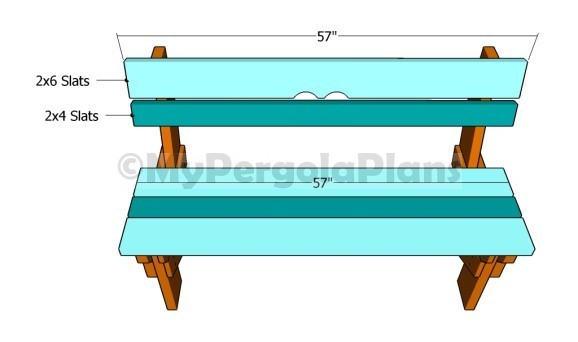
Attaching the slats to the bench
Building the seat and the back of the bench is really easy, but you need to align the slats at both ends and to space them properly. Drill pilot holes through the slats before driving the 2 1/2″ screws into the frame. If you want to enhance the look of the bench, you could make several notches inside one of the back slats.
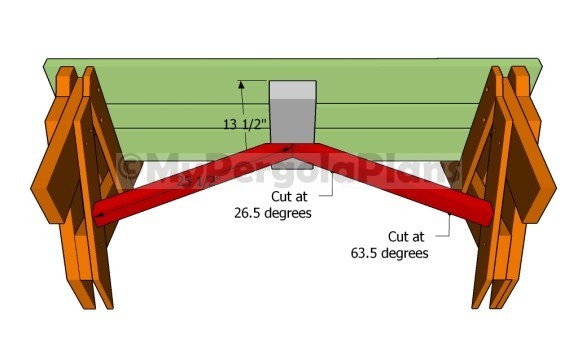
Attaching the bottom braces
Adding these braces underneath the garden bench is a great idea, as it will give extra-support to your woodworking project. Make the necessary cuts to the braces and lock them into place with screws. Center the
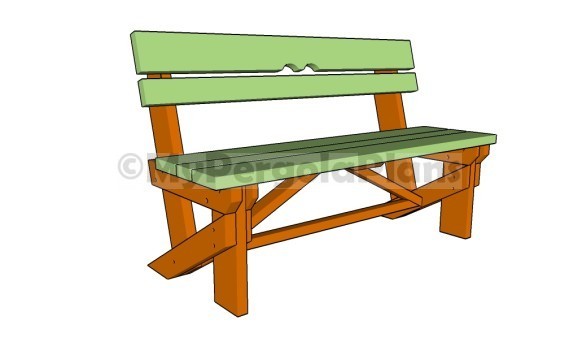
Garden bench plans free
Last but not least, we recommend you to pay attention to the finishing touches. Therefore, check if all the screws are inserted properly and fill the holes with wood putty. Smooth the surfaces with 120-grit sandpaper along the wood grain. In addition, apply several coats of paint over the components in order to protect them from decay and to enhance the look of the bench with back support.
Tools & Materials
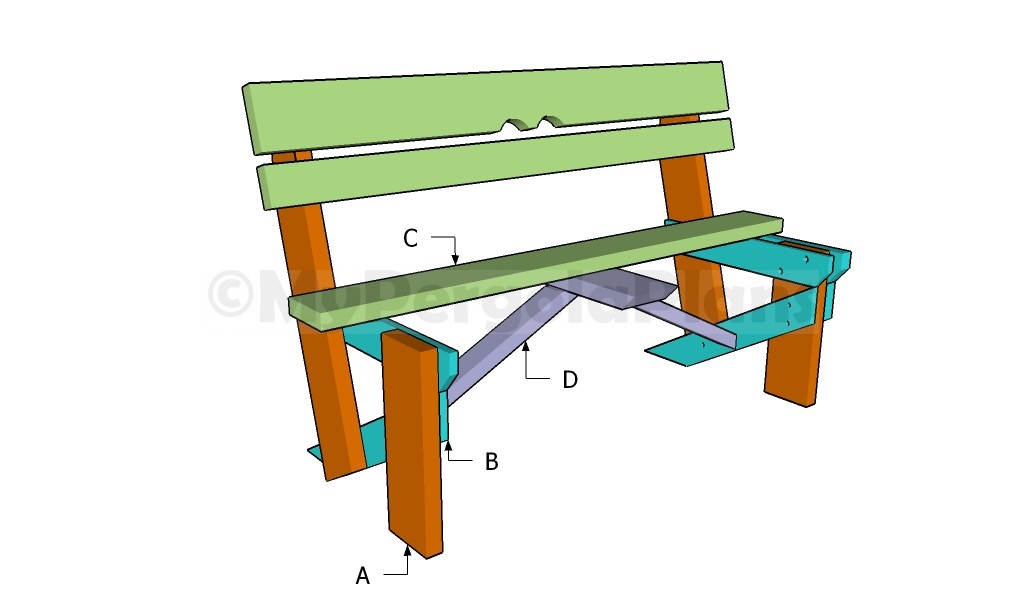
Building a garden bench
- A – 4 pieces of 4×4 lumber – 96″ LEGS
- B – 4 pieces of 2×2 lumber – 150″ BRACES
- C – 13 pieces of 2×6 lumber – 150″ SLATS
- D – 5 pieces of 2×2 lumber – 130″ SUPPORTS
- Safety gloves and glasses
- Circular saw, Jigsaw
- Tape measu, Spirit level, Carpentry pencil
- Drill machinery and Drill bits


